Forensic disk images of a Windows system: my own workflow
Every forensic analyst, during his experience, perfects his own workflow for the acquisition of forensic images.
Today I want to propose my own workflow for acquisition of physical disks on Microsoft Windows systems
Required tools
FTK Imager
The Forensic Toolkit Imager (FTK Imager) is a commercial forensic imaging software package distributed by AccessData.
It comes in 2 versions: GUI version, and Command-Line only.
GUI: http://accessdata.com/product-download/ftk-imager-lite-version-3.1.1
Command Line: http://accessdata.com/product-download/windows-32bit-3.1.1
CAINE (Computer Aided INvestigative Environment)
GNU/Linux live distribution that offers a complete forensic environment organized to integrate existing software tools as software modules and to provide a friendly graphical interface.
Download: http://www.caine-live.net/
Image acquisition on a running system
Using FTK Imager (on 64 bit Windows Systems)
- Login to via local admin account on the target system.
- Connect the external HDD into the target system.
- Take notes on the information about the affected system: computer name and system characteristics. This can be found at: Start -> Computer -> Properties.
NOTE: Take a screenshot and put it on the external HDD.
- Identify and take notes on the volumes that are currently mounted on the system through the Computer Management console (Start -> right click on Computer -> Manage). Navigate into “Disk Management”.
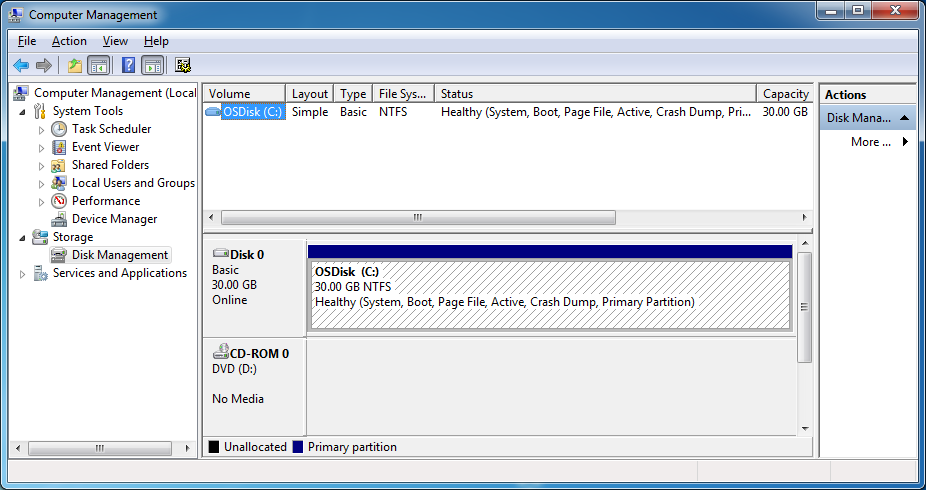
NOTE: Take a screenshot and put it screenshot on the external HDD
- Open Windows Explorer and navigate to the FTK Imager Lite folder within the external HDD.
- Run FTK Imager.exe as an administrator (right click -> Run as administrator).
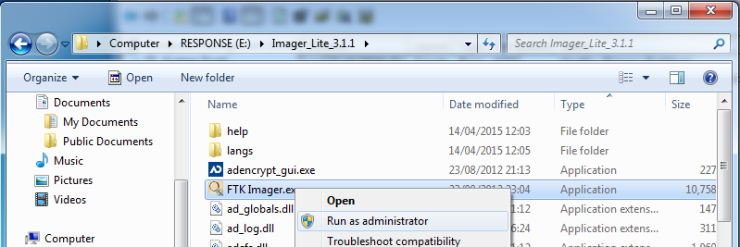
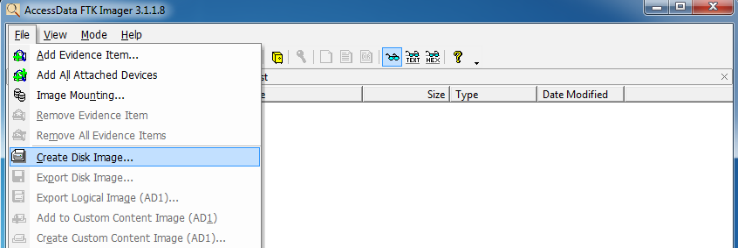
- In FTK’s main window, go to File and click on Create Disk Image.
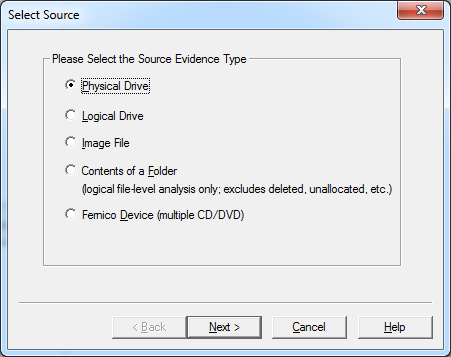
- Select Physical Drive as the source evidence type. Click on Next.
- Select the actual physical drive from the drop down list and click on Finish.
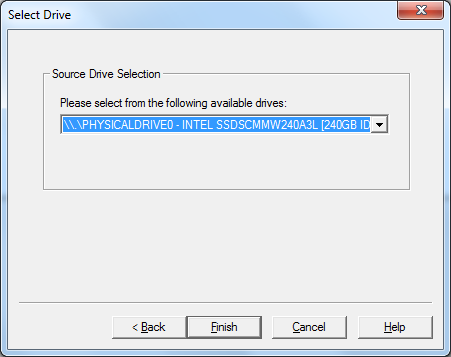
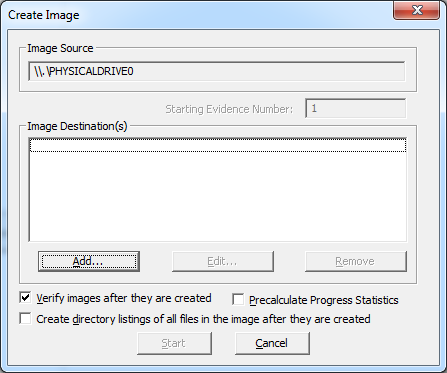
- In the Create Image window click on Add (in the Image Destination(s) section).
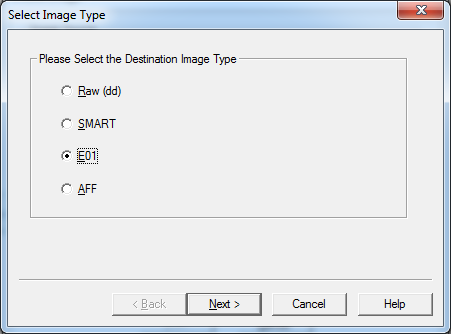
- Select E01 as the destination image type and click on Next.
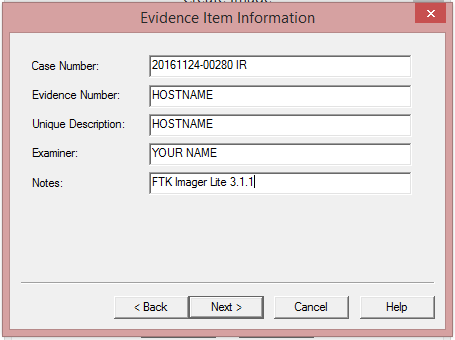
- Complete the Evidence Item Information and click Next. Here an example:
- In the Image Destination Folder browse for the external collection drive (if different from the response drive) and click OK.
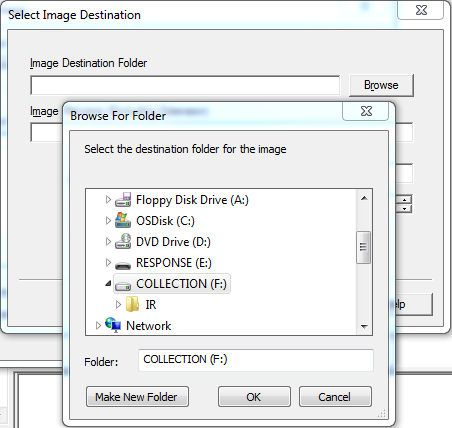
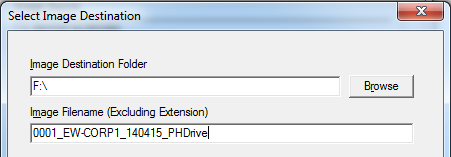
- Provide a name for the image within the Image Filename box. Usually I use this naming convention: DATE_TIME_HOSTNAME. (Example: 08122016_1500_WEB001)
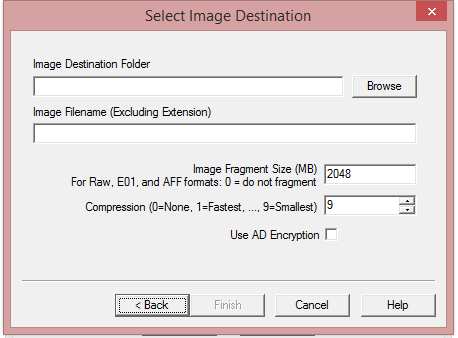
- Change the Image Fragment to 2048. Additionally, set the level of compression to 9 (smallest). Click on Finish.
- Check “Precalculate Progress Statistics” to see how much time and storage space creating the custom image will require before you start
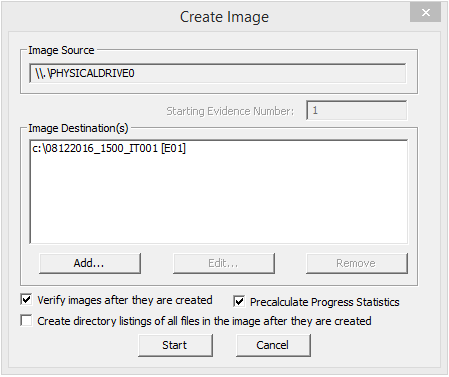
- Click on Start and record the time in your notes. The progress of the imaging process will be displayed as well as the elapsed and remaining time.
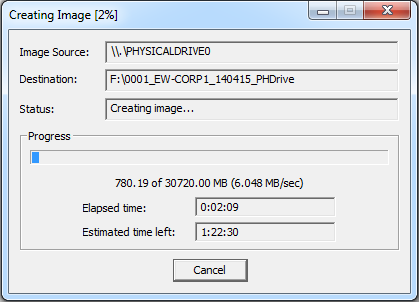 ì
ì
- If the option “Verify images after they are created” was selected in step 16, the verification process starts immediately after the imaging process finishes.
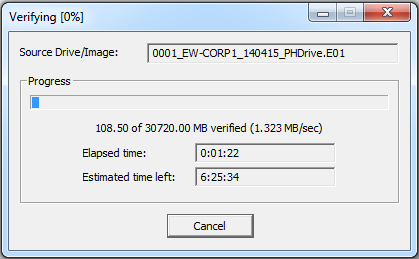
The verification process might take some time to complete, but do not cancel it as it is important to know if the image was successfully created.
- After the image is generated, a log file is created in the same location where the image is saved.
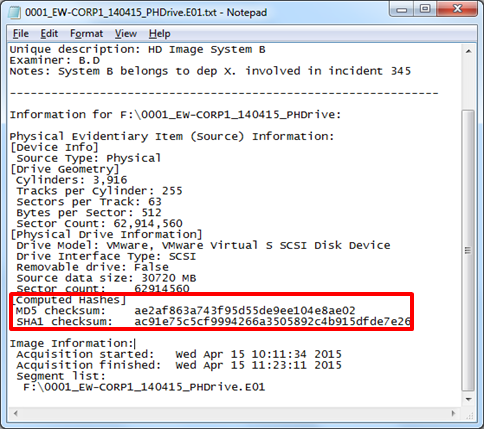
Using command line FTK Imager (for 32 bit Windows System)
If you are trying to image 32 bit Windows System, you will need to use FTK Imager Command Line:
- Login with a local admin account on the target system.
- Connect the external HDD into the target system that has FTK Imager Command Line folder residing on it.
- Take notes on the information about the affected system: computer name and system characteristics. This can be found at: Start -> Computer -> Properties.
NOTE: Take a screenshot and put it screenshot on the external HDD.
- Identify and take notes on the volumes that are currently mounted on the system through the Computer Management console (Start -> right-click on Computer -> Manage). Navigate into ‘Disk Management’.

NOTE: Take a screenshot and put it screenshot on the external HDD
- Open a command prompt
- Navigate to the location of the FTK Imager Command Line Folder and then run the following command:
E:\\>ftkimager.exe <HARD DRIVE THAT YOU WANT TO IMAGE> e:\\<Destination path of output file with name NOT extension> --e01 –-frag 2G –compress 9 –verify
Example:
E:\\>ftkimager.exe \\\\.\\PhysicalDrive0 e:\\IMAGE\_FOLDER\\filename --e01 –-frag 2G –-compress 9 –-verify
You should be seeing the following type of information:

Image acquisition on a powered off system
- Start the system with a Live linux distribution from CD or USB Stick: Ubuntu, Kali or (my suggestion) CAINE.
- Connect the external HDD into the target system.
- Mount the file system by creating a mount point and then mounting the external disk (ex. /dev/sdb1).
root@caine:~# mkdir /mnt/target
root@caine:~# mount /dev/sdb1 /mnt/target
- Create a cryptographic fingerprint of the original disk (ex. /dev/sda) using MD5. This will be used to verify the integrity of the duplicate.
root@caine:~# md5sum /dev/sda > /mnt/target/08122016\_1500\_WEB001.md5
-
Use dd with the input source being the /dev/sda and the output file with chosen name.
(Example: 08122016_1500_WEB001)
Other useful options is the conv=sync,noerror to avoid stopping the image creation when founding an unreadable sector.
If such sector is found with this option, it will skip over the unreadable section (noerror) and pad the output (sync).root@caine:~#dd if=/dev/sda of=/mnt/target/08122016\_1500\_WEB001.img conv=sync,noerror bs=8k 19536363+0 records in 19536363+0 records out 160041885696 bytes (160 GB) copied, 5669.92 s, 28.2 MB/s -
Finally create the fingerprint of the image created and verify that both fingerprints match and unmount the drive.
root@caine:~#md5sum /mnt/target/08122016\_1500\_WEB001.img > /mnt/target/08122016\_1500\_WEB001.img.md5
root@caine:~# cat /mnt/target/\*.md5

6a5346b9425925ed230e32c9a0b510f7  /mnt/target/08122016\_1500\_WEB001.img

6a5346b9425925ed230e32c9a0b510f7  /dev/sda

root@caine:~# umount /mnt/target/