How to setup a personal, private wiki with TiddlyWiki, GitHub, Cloudflare Pages and Cloudfare Access
Several years ago, during a SANS course, I discovered TiddlyWiki for the first time. Since then, I have never stopped using it, despite its somewhat dated UI.

TiddlyWiki is a highly versatile and customizable personal wiki that allows me to organize my thoughts, notes, and ideas in a way that is accessible and easy to navigate. What I love about TiddlyWiki is its ability to adapt to my specific needs and workflows, making it an indispensable tool for my daily work. Even though the interface may not be the most modern or flashy, the functionality and flexibility of TiddlyWiki make it a must-have for anyone looking for a reliable and efficient note-taking and organization tool.
In this post, I will try to describe my personal ‘self-hosted’ solution for publishing the wiki on the web, in order to make it accessible from all my devices.
1. Prerequisites
- a GitHub account
- a personal domain configured on Cloudflare
In order to avoid to maintain “public” you repository (if you need to store personal information on your wiki), you can use Cloudflare pages. This allows to restrict access to your wiki using the Zero Trust infrastructure of Cloudflare.
2. Get TiddlyWiki
Go to [) and click on the “Download Empty” button on their homepage. This will allow you to save a file called index.html to a convenient place on your computer.
3. Create GitHub repo
-
If you don’t already have one, create an account at [)
-
At GitHub create a new “Private” repository.
-
Upload your TiddlyWiki to your new repository In the Quick Set Up box click on the link for “uploading an existing file”.

On the subsequent page you can either drag and drop the empty TiddlyWiki index.html file you saved on your computer or you can click “choose your files” to find and upload the file. Click on the “Commit Changes” button.
Since our wiki is on GitHub, we’ll want to use the Save to a Git Service instructions. Once set up, the changes to our TiddlyWiki should automatically self-save (this can be changed within your wiki’s Control Panel too) or they can be saved manually using the TiddlyWiki checkmark save functionality. But first you need to restrict access to your wiki.
4. Deploy to Cloudflare pages
-
Login into your Cloudflare account and click on the Pages icon on the right side menu, this will take you Cloudflare Pages dashboard. Then click on create the project.
-
This will take to you a webpage that asks you to connect to your GitHub account.
-
Now authorize the repositories you want Cloudflare Pages to get installed, you can select all repositories (or) selected repositories
-
Select the repository create in the previous step and configure the deployment settings:
Name of the project: give a name to your project (e.g. ‘wiki’)
Production branch: master
Framework: None
Build command: leave empty
Build Output folder: leave empty
After you have selected your configuration, click on save and deploy. Now Cloudflare will build and deploy your site.
Set your custom domain
- Select your Pages project > Custom domains.
- Select Set up a domain.
- Provide the domain that you would like to serve your wiki (e.g. wiki.yourdomain.com) on and select Continue.
5. Restrict access with Cloudflare Access

Add your application to Cloudflare Access
-
In Zero Trust, go to Access > Applications.
-
Select Add an application.
-
Select Self-hosted.
-
Enter any name for the application (e.g ‘wiki’).
-
Choose a Session Duration. The session duration determines the minimum frequency for which a user will be prompted to authenticate with the configured IdP. If you want users to re-authenticate every time they reach your application, select No duration, expires immediately.
-
In Application domain, enter the custom domain created in the previous step.
-
In the Identity Providers card, select the identity providers you want to enable for your wiki (i usually use GitHub).
-
Select Next.

You may repeat this steps also for *.pages.dev domains automatically created by Cloudflare: for more information, please refers to this post on Cloudflare community.
Configure Access policy
You can now configure an Access policy to control who can connect to your application.
-
Enter any name for your rule.
-
Specify a policy action.
-
Assign Access groups to reuse existing rules, or create new rules. You can add as many include, exception, or require statements as needed.
-
Select Next.
6. Setting up Personal Access Tokens
Now you can enable the Save to GitHub feature on TiddlyWiki: you will need a GitHub Personal Access Token:
- On GitHub, click on your user icon, select “Settings”, then “Developer Settings”
- Next click on the “Personal Access Tokens” tab and then click “Generate new token”
- Give your token a descriptive name (e.g. “TiddlyWiki”)
- Under scopes, select “repo” (and all of its sub-scopes)
- Click the “Generate Token” button at the bottom of the page.
Once created, immediately copy this string somewhere safe since navigating away from the page will not allow you to recover it. (If you do, you’ll need to regenerate a new token.)

- Finally open Wiki configuration (using the gear icon), go in the Git Service Saver tab under the Saving tab end compile the form using your repo data and the access token. There’s no explicit save button, just ‘X’ out of the settings control panel and click your TiddlyWiki’s main save button. Your token value should be stored in browser local storage.
Now you can edit any Tiddler and, when you save it, the new version of index.html page will be uploaded to your private repo: then, the CI actions provides publishing on the Cloudflare network.
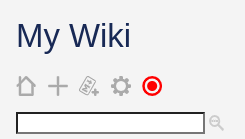
After edits to your wiki, you’ll see that the checkmark icon on the page is red (depending on your theme), indicating changes to save. You can click on it to force a save.
The access to your wiki i managed by Cloudflare Access, using the identity provider chosen in the step 5.